31 March 2007

In My Easter Basket


Easter is my mother’s favorite holiday. Weeks before it arrived, she would be working on the perfect Easter dress for me, shopping for terribly uncomfortable shiny white shoes, and dying eggs. In my closet, there are still boxes of the dresses my grandmother made every year, with handmade smocking and painstaking embroidery of little ducks and chicks. There is a photo of me on our front porch in an Easter dress and hat, squinting in the sun and looking positively miserable. Needless to say, I didn’t much like Easter, it meant itchy stockings and being forced to wear a hat and a fancy brunch where my mother’s friends ooh-ed and awed over how cute I was.

There at least was the promise of candy, in the form of an Easter basket, and the excitement of waking up to a surprise. It was always fun to dig around that funny plasticy nesting to see what was in there: one of those crafted sugar eggs, a chocolate bunny, and plenty of jelly beans. My mother had a couple notorious incidents of forgetting the basket until the last minute, hurriedly putting me to bed and then running out to the local drug store in the middle of the night. Though I was fully aware of all this, I never let on, and the basket always managed to arrive in the morning.


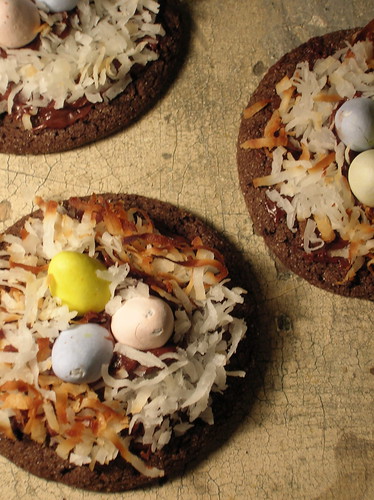
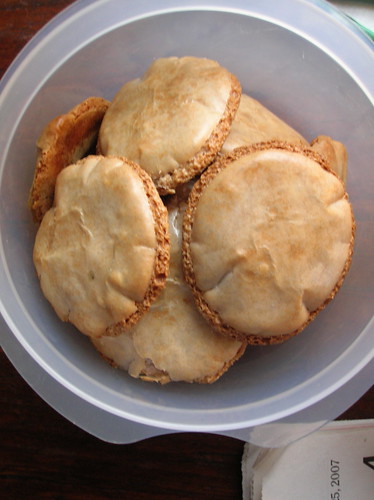
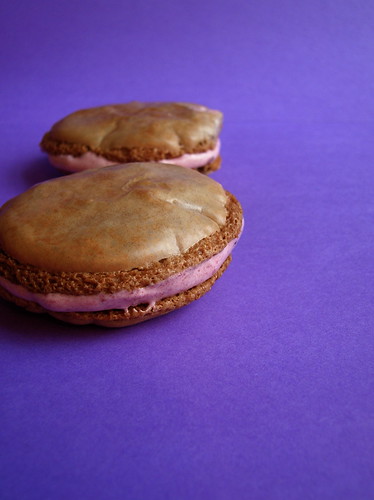
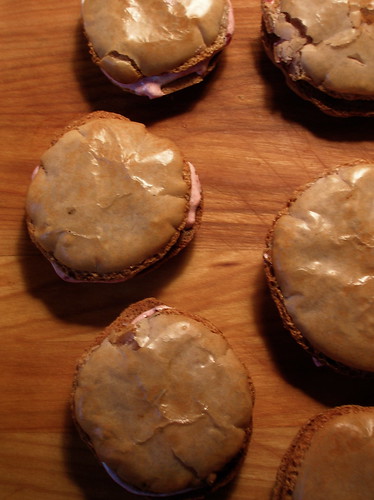
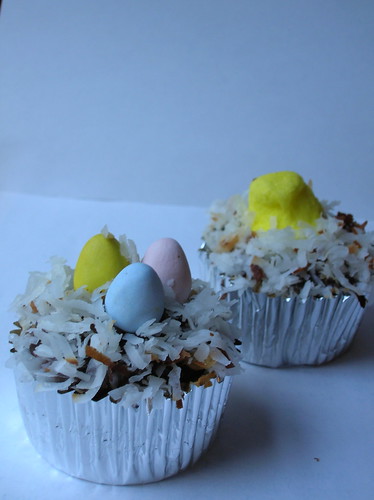
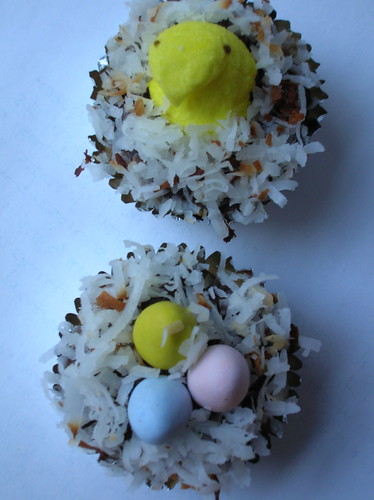
These days, I’m too old for Easter baskets, but I’ve been eyeing these cute little nest cupcakes since I saw them a couple years ago. Luckily, I have a precious three year old cousin, and though I’m sure his parents will not forget his Easter basket, I’m happy to contribute. I placed the little coconut nests on cupcakes and also on cocoa cookies, since the ccokies can be wrapped up and travel more easily. Unlike so many Easter confections, the pairing of chocolate and coconut means these actually taste pretty good too.


Easter Nests
These are easy and fun to decorate with kids. I’ve provided my basic cupcake recipe below, but you can use any cupcake or cookie recipe you like.

vanilla cupcakes (recipe follows) or cocoa cookies
chocolate frosting (recipe follows)
1 1/2 cups shredded coconut
chocolate eggs, jelly beans, or candy chicks

1. Preheat the oven to 350 degrees. Spread the coconut on a baking sheet and place in the oven to toast for about 8 minutes, until light brown.
2. Spread a small amount of chocolate frosting on a cupcake or cookie and arrange some of the coconut on top to form a nest. Place another small dollop of frosting in the center of the nest and nestle the eggs in the middle.

Vanilla Cupcakes
1 1/4 cups flour
1 tsp baking powder
1/2 tsp salt
6 tbl butter
1 cup sugar
2 eggs
1/2 cup milk
1 tsp vanilla

1. Preheat the oven to 350 degrees;. Line a cupcake pan with paper liners; set aside.
2. In a medium bowl, sift together flour, baking powder, and salt. Using an electric mixer or with a fork, cream butter and sugar until light and fluffy. Add eggs, one at a time; scrape down bowl, and beat in vanilla.
3. Add flour mixture and milk alternatively, beginning and ending with flour mixture.
4. Divide batter evenly among liners, about three-quarters full each. Bake until golden and tops spring back to touch, about 20 minutes, rotating pan once if needed. Transfer pans to wire rack; cool completely.

Chocolate Frosting
6 oz semisweet chocolate, roughly chopped
4 tbl butter
1 tsp vanilla
4 cups (1 box) powdered sugar
1/2 cup milk

1. Melt the chocolate, either in the microwave or using a double boiler.
2. In a mixer or with a fork, cream the butter until pale and fluffy. Add the vanilla, then beat in half the powdered sugar. Fold in the melted chocolate until smooth. Add the remaining powdered sugar, alternating with the milk, until the desired consistency of frosting is reached.

_

30 March 2007

Beet Ravioli in Poppy Seed Butter


If you think ravioli is cheesey, bland, and heavy, or that it is very difficult to make, than I have the recipe for you. Many raviolis are unfortunately leaden or labor-intensive, but this one is neither. With bright red beet filling and bathed in a swath of poppy seed butter, these are positively ethereal. Each time I make these, I think I don’t make them nearly often enough. And the thing is, they’re not that difficult. You can certainly make your own pasta dough, if you’re into that sort of thing. Me, I’m perfectly happy using one of two shortcuts: purchased fresh pasta dough from my local pasta shop, or wonton wrappers. My only word of advice would be that these are light, so if you plan on serving them as a main course you may want to plan another hearty dish alongside. That doesn’t mean these little raviolis won’t steal the show, though.


Beet Ravioli with Poppy Seed Butter
These would make an elegant first course or light lunch.

2 large red beets (about 14 ounces)
1/2 cup fresh ricotta cheese
2 tablespoons dried breadcrumbs
1 1/4 pounds fresh egg pasta or wonton wrappers
4 tbl (1/2 stick) butter
2 tablespoons poppy seeds
Freshly grated Parmesan cheese

1. Preheat oven to 400°F. Wrap beets individually in foil; place on baking sheet. Roast until tender when pierced with knife, about 1 hour. Open foil carefully (steam will escape). Cool. Peel beets; finely grate into medium bowl. Add ricotta cheese and season to taste with salt and pepper. Stir in breadcrumbs.
2. If necessary, roll pasta dough into thin sheets. Place 1 dough sheet on work surface. Using 3-inch round biscuit cutter, cut sheet into 7 rounds. Transfer rounds to lightly floured baking sheet; cover with plastic wrap. Repeat with remaining dough.
3. Place a few of the pasta rounds on your work surface, keeping remaining dough covered with plastic. Place a small bowl of water nearby. Spoon 1 teaspoon beet filling onto half of each round. Dip fingertip into water and dampen edge of 1 round. Fold dough over filling, pushing out as much air as possible and pressing edges firmly to seal. Repeat with remaining rounds.
4. In a wide skiillet, melt the butter with the poppy seeds, keep warm over very low heat. Working in batches, cook ravioli in large pot of boiling salted water until just done, about 2 minutes. Using slotted spoon, transfer to skillet with melted butter; toss to coat. You may need more butter. Place ravioli on plates; sprinkle with Parmesan if desired.

29 March 2007

Skillet Required


My family may well disown me if I don't get a cornbread recipe up here 'right quick,' so here we go. There have certainly been enough diatribes on cornbread to make it worthy of a UN peace treaty, so I’ll spare you any rhetoric except to say a few key things.

My cornbread is of the Southern variety, meaning it has no flour and barely any sugar. I can appreciate those sweet Northern varieties well enough, but to me they are more like muffins, and are too rich and sweet to be a side dish at dinner, much less dunked in a bowl of chili. Second, cornbread must be baked in a cast iron skillet because of the way the skillet retains heat which helps form the crispy crust. Finally, my grandmother and my mother have always insisted on white cornmeal, with no reason other than that’s the way it was always done. My mother says it gives a more tender crumb, and the cornbread still comes out yellow from the egg yolks and the toasting effect of the oven.

Skillet Cornbread
I was told that the key to remembering this recipe is that everything is in two’s. However, I find that two extra large eggs will make the batter too liquidy, so use two smaller eggs or one extra large.

2 tbl bacon drippings or shortening
2 cups cornmeal, we prefer stoneground white
2 tsp baking powder
1 tsp baking soda
1 tsp salt
1 tbl sugar
2 eggs (not extra large)
2 cups buttermilk

1. Preheat the oven to 450. Place the 2 tablespoons of fat into a 9 or 10 inch cast iron skillet and place the pan in the oven to heat.
2. In a bowl, stir together the dry ingredients. In a seperate bowl, mix together the eggs and buttermilk. Combine the wet and dry ingredients.
3. Remove your preheated skillet and swirl it to distribute the fat. Pour the batter into the skillet (it should sizzle), and place in the oven. Bake for 20 minutes, until risen and golden.

Mix It Up: chopped scallions, bacon crumbles, a can of creamed corn, or chilis and cheese are possible additions to play around with.

_

27 March 2007

Big Hair, Big Welcome


A few weeks ago, I boarded a plane out of the cold, snowy, still winter-laden northeast, and headed south. My trip to Houston was two-fold in it’s purpose, a bit of business, but mainly a good visit to my uncle and his sunny welcoming home. Emerging from the plane, I felt a strange chill in the airport: ah, yes, airconditioning, they already need airconditioning. The rodeo was on, the sun was shining, and it was perfect for playing in the backyard with the dogs and walking around the museums. We had a great time, and I was once again reminded that cold, gritty, expensive cities (ahem, ny) are not the only way to go in the U.S.

There was sunny weather and Live Oak-lined boulevards, art galleries and live jazz, good food, good wine, good friends and even a baby in a Mexican sombrero. There were discusions of making homemade baking powder and my grandfather’s love of all things cornbread (recipes to come soon!), and there was red velvet cake. Yes, Red Velvet Cake. I don’t want to overshadow the Blue Bell ice cream, chicken fried steak, tortilla soup, bbq, fig jam, Vietnamese food, pecans, and Brown Paper Chocolates that I should be telling you about, but let’s talk about that Beauty Queen of a cake.


Being a girl of Southern roots, I’ve always had a thing for red velvet cake. Maybe it’s the shocking hue, but I think it’s more about the tender-crumbed cake paired with delectable cream cheese frosting. And while red velvet has gradually been gaining popularity in the northeast (often with unfortunately insipid icing), it was recently catapulted to stardom with a feature in the New York Times. I had, of course, clipped the recipe and filed it away, but you can’t imagine how pleased I was when I arrived in Texas to find my uncle had beat me to it and already made the thing.

If the pictures of the towering three-story beauty aren’t evidence enough, let me tell you that this is the real stuff. Moist, flavorful, good cake. And that mascarpone frosting? As my uncle said, "we had to pour the extra down the disposal so we wouldn’t eat the whole bowl." So if you were thinking (as I had thought when I clipped the recipe) of substituting your usual cream cheese frosting, I’m here to tell you to take the dive into caloric excess. It’s worth every bite.

To wrap things up, my uncle also took me to Central Market one evening so I could cook dinner, and I made a nice little saute of Shrimp and Snow Peas in Spicy Black Bean Sauce. This comes together quickly and has a satisfying bite to it, I served a simple red-wine braised cabbage on the side.


Red Velvet Cake
This has a surprising amount of red food coloring in it, so make sure you have enough on hand before proceeding.

3½ cups cake flour
½ cup unsweetened cocoa (not Dutch process)
1½ teaspoons salt
2 cups canola oil
2¼ cups granulated sugar
3 large eggs
6 tablespoons (3 ounces, 1/4 cup plus 2 tbl) red food coloring
1½ teaspoons vanilla
1¼ cup buttermilk
2 teaspoons baking soda
2½ teaspoons white vinegar.

1. Preheat oven to 350 degrees. Grease 3 round 9-inch layer cake pans and line bottoms with parchment.
2. Whisk cake flour, cocoa and salt in a bowl.
3. Place oil and sugar in bowl of an electric mixer and beat at medium speed until well-blended. Beat in eggs one at a time. With machine on low, very slowly add red food coloring. (Take care: it may splash.) Add vanilla. Add flour mixture alternately with buttermilk in two batches. Scrape down bowl and beat just long enough to combine.
4. Place baking soda in a small dish, stir in vinegar and add to batter with machine running. Beat for 10 seconds.
5. Divide batter among pans, place in oven and bake until a cake tester comes out clean, 40 to 45 minutes. Let cool in pans 20 minutes. Then remove from pans, flip layers over and peel off parchment. Cool completely before frosting.

Whipped Mascarpone Frosting for Red Velvet Cake
2 cups heavy cream, cold
12 ounces cream cheese, at room temperature
12 ounces mascarpone
½ teaspoon vanilla
1½ cups confectioners’ sugar, sifted.

1. Softly whip cream by hand, in electric mixer or in food processor. Cover in bowl and refrigerate.
2. Blend cream cheese and mascarpone in food processor or electric mixer until smooth. Add vanilla, pulse briefly, and add confectioners’ sugar. Blend well.
3. Transfer cream cheese mixture to bowl; fold in whipped cream. Refrigerate until needed.

Shrimp and Snow Peas in Spicy Black Bean Sauce
I do the snow peas seperately because I like them to be well-cooked and don’t want to risk over cooking the shrimp. If you’re not worried about your snow peas being on the crunchy side you can saute them at the same time with shrimp.

1/2 lb snow peas
2 tbl each minced garlic
1 tbl minced ginger
1 lb shrimp, peeled and deveined
2 tbl peanut or vegetable oil
1/4 cup fermented black beans*
3 tbl soy sauce
1 tsp sugar
1 tsp arrowroot powder or cornstarch
3/4 cup broth or water
1 pinch red pepper flakes
sliced green onions for serving

1. In a wok or large saute pan, heat 1 tbl of the oil. Add the snow peas and cook over high heat until they are softened and just beginning to show some color. Add 1/2 cup of water and continue to cook over high heat until the snow peas are softened and the water has evaporated, about 5 minutes. Transfer the snow peas to your serving platter.
2. Combine the soy sauce, sugar, arrowroot, broth or water, and red pepper in a small bowl and stir to dissolve completely.
3. Heat the remaining tablespoon of oil in the same pan. Add the garlic and ginger and saute about 1 minute. Add the shrimp and cook, stirring constantly, until they are just beginning to color, a few minutes. Add the black bean sauce and stir to combine and coat the shrimp. Add the soy sauce mixture and cook until the shrimp are pink and opaque and curled only 3/4 of the way closed and the sauce is thickened.
4. Pour the shrimp and their sauce over the snow peas in the dish, garnish with a few chopped green onions, and serve immediately.

*Fermented black beans are avilable in Chinese markets, if you can’t find them you can substitute a bottled black bean sauce which is available in the Asian section of most supermarkets, but look for one that doesn’t have too many added ingredients.
_

25 March 2007

Repeat Offender


It is rare that I make any recipe twice in a row- part of the problem with my curious cooking mind is that I am always ready to move on to the next thing, tackle the next recipe in the pile. A good recipe gets checked and neatly kept for the future, while a bad one is shoved aside in an attempt to forget it’s failures, either way, I’m on to the something new.

So it’s pretty unusual that after we gobbled up the first far breton I made, that I turned around and made another one, exactly the same. That first one was so good, we just hadn’t had our fill yet. And when having brunch the following weekend, I pulled it out again, tried, true, and soon devoured. Luckily, this is also an easy one, a simple batter that bakes to custardy smooth perfection, studded with plump, juicy prunes. I did find refrigerating the batter overnight made a difference in the smooth texture, and I’ll have to ask that you do the same. This actually makes your life super-easy if you are planning to serve this for brunch; and if you’re serving it for dessert, you can give it a few good hours rest while you are preparing dinner. And if you find yourself making it again when you’ve finished the first one, well, don’t say I didn’t warn you.


Far Breton
Sort of like a custardy pancake, this is equally good for breakfast or dessert. Adapted from Dorie Greenspan.

3 large eggs
2 cups milk
1/2 cup sugar
1/4 teaspoon pure vanilla extract
1/8 teaspoon salt
4 tablespoons unsalted butter, melted and cooled, plus more for pan
3/4 cups all-purpose flour
1 cup pitted prunes
1/4 cup Armagnac or 1 cup hot tea, such as Earl Grey
Confectioners' sugar, for dusting

1. Place eggs, milk, sugar, salt, vanilla, and melted butter in a blender or food processor and blend for 1 minute. Add flour, and pulse several times. Pour batter into a pitcher, cover, and refrigerate for 3 hours, or preferably overnight.
2. Meanwhile, place prunes, 1/4 cup water, and Armagnac in a small saucepan over medium heat. Simmer until prunes are plumped and the alcohol no longer smells pungent, a few minutes; set aside to cool. If using tea, place prunes in a heatproof bowl and pour tea evenly over fruit. Let cool to room temperature, cover, and set aside.
3. Place rack in center of the oven and preheat to 375°. Butter an 8-by-2-inch round cake pan; or use an 8 inch skillet. Place the pan on a baking sheet.
4. Remove batter from refrigerator and whisk to reblend. Forcefully tap the bottom of the pitcher on your work surface to break any top bubbles. Pour batter into prepared pan. Add the prunes, evenly distributing them within the batter; discard any remaining soaking liquid. Bake until top of the cake is puffed and brown and a thin knife inserted into the center comes out clean, 50 to 60 minutes. Transfer pan to a wire cooling rack and cool to room temperature. If desired, dust with confectioners’ sugar just before serving.

*My notes: Dorie says to use whole milk but I've used lowfat and produced very pleasing, if slightly less rich, results. Also, look for good quality plump prunes, I used ones that come vacuum sealed to help keep them moist.

_

24 March 2007

In the Key of C

black lacquer chicken 3
Sundays in our house were opera days. In the morning, deep into the thick of the Sunday paper with the coffee growing cold at our sides, the warbles of La Wally filled the air. In the afternoon, in the car running errands or at home washing windows, Texaco Opera theater broadcast live from the Met. We didn’t go to church, but I’ll be damned if listening to Maria Callas with the sun streaming in through the big glass windows wasn’t a religious experience.

My love for opera so cultivated, it’s natural I also became an opera attendee. When I moved to New York, I discovered you could get standing room tickets at the Met for only $15. I would step into the special standing room area they have, but when the lights began to go down you could usually slip out and find a seat in the orchestra section, the huge hall stretching up above you. I sang along to the chorus in Nabucco, watched real lions parade through Aida, and at intermission I chatted with ladies in fur coats who had paid $300 for their seats. Sometimes the productions were stodgy, but the whole experience, the huge sets, the great voices, were magical.

I still love to dash over to Lincoln Center early in the evening and grab a ticket at the last minute, and on my most recent trip “The Opera Lovers Cookbook” naturally drew my eye as I passed time browsing the gift shop. While the girth of many opera singers may hint at good appetites, this book seeks to marry menus with opera plots (a tapas party for Carmen), and comes up with some charming recipes along the way.

I chose to make the Madame Butterfly inspired Black Lacquer Teriyaki Wings, except I used a combination of drumsticks and wings (I don’t really get wings, I mean, where’s the meat, it’s like knawing some scrawny elbow). Anyway, I may have mentioned a slight aversion to chicken in the past, but seriously, I think you could slather this sauce on some shoe leather and it would be good. Not to mention it’s an absolute mess to eat, but I didn’t hear a single complaint, only sticky fingers and grunts of pleasure. Those fur-coated ladies may not approve of the sauce streaked across your cheek, but this one’s worth a high note of appreciation.
black lacquer chicken 2
Black Lacquer Chicken
From the Opera Lover’s Cookbook, serves 6-8.

4 pounds chicken wings and drumsticks, wings split at the joints
5 large cloves garlic, minced
1 cup teriyaki sauce
1/2 cup honey
1/2 cup sake (I substituted tea)
1/2 cup orange juice
1/4 cup finely minced candied or fresh ginger
2 tablespoons sesame seeds

1. Preheat oven to 400°F. Line a roasting pan with aluminum foil and arrange the chicken in a single layer.
2. Stir together the garlic, teriyaki sauce, honey, sake, orange juice, and ginger in a bowl until well combined.
3. Pour the mixture over the chicken and bake for 1 hour. Raise the heat to 450 degrees, turn the pieces over, baste with sauce, and bake for an additional 30 minutes until the chicken is dark and the sauce very thick.
4. Transfer the wings to a serving platter and top with the sesame seeds.

21 March 2007

With Knife and Fork

artichoke flan 1
Open the kitchen drawer of any Damascus household and you’ll find the usual assortment of knives, forks, and spoons. But spend a little time eating in those households, and you may begin to wonder how often those forks actually get used. Most traditional foods are meant to be eaten with the hands or with a spoon. Assortments of appetizers are scooped in thin bits of pita, kibbe meatballs are dipped into hummus, taboule lifted with elegant cups made of lettuce leaves. Soups and stews are ladled over rice and eaten with spoons, even pieces of fish and meat are tender enough to make knives obsolete. I can’t tell you how many times I’ve seen spaghetti or noodles prepared, then vigourously cut with into bite-size lengths and served with a spoon.

One evening when I was still staying with a Syrian family, I came home late, got a plate of eggplant parmesan I had fixed earlier, and sat down to eat. In the cold kitchen, my knife and fork clanked against the plate as I cut and chewed. The two young girls came dancing by me and immediately began giggling and pointing. “Look at how she eats,” they laughed, sitting down beside me and exaggeratedly imitating how I held my utensils. Obviously, they know how to use a knife and fork, but the whole picture, a girl sitting alone and eating in such a formal manner, was unusual to them, and became a joke with us for several months.

As much as I adore Syrian food, sometimes you get a craving for something different, in this case something texturally different. I wanted something light and delicate and when I saw a recipe for asparagus flan it hit just the right chord with me. Asaparagus wasn’t in the market but freshly prepared artichoke bottoms were, along with gorgeous bunches of mint. The batter came together easily and was soon in my temperamental oven. While it cooked, I fixed an accompanying tomato sauce, which was just the right thing for dressing this up, though the flan is wonderfully good on its own. Smooth, light, and delicately flavorful, it was the perfect thing to sit down and lunch on, knife and fork in hand.
artichoke flan 2
Artichoke-Mint Flan
Please don't be put off by the length of the recipe, it is really not that difficult and yields an impressive result. Serve with the following Saffron Tomato Sauce.

1 pound artichoke bottoms (from about 5 large artichokes)
1 tbl lemon juice
1-2 tbl fresh mint
4 large eggs
1 cup milk
2 Tbs freshly grated Parmigiano-Reggiano
salt and fresh white pepper, to taste

1. If you have whole artichokes, trim away all the leaves and furry choke so that you have just the meaty bottoms. Keep the prepared artichokes in water with the lemon juice to keep them from discoloring. Chop up the artichokes and place them with the liquid they were stored in into a medium pot. Boil the artichokes until very tender, about 45 minutes. Drain and set aside to cool. (all of this can be skipped by using canned artichoke bottoms)

2. Preheat the oven to 325 degrees Fahrenheit, and set a rack to the middle position. Butter an 9” square cake pan, line the bottom of the pan with wax paper, and butter the paper. Prepare the equipment for the hot water bath. You will need a baking dish large enough to hold the cake pan and deep enough to safely hold at least an inch of water; I used a large roasting pan. Fill a large pot with water, and bring it to a boil: this water will be used in the water bath.

3. Puree the artichokes with the mint in a food processor or blender until very smooth. Scrape the purée into a large sieve set over a bowl, and press and stir the purée through the sieve into the bowl. This takes a bit of arm strength, but it is well worth it: when you are finished, you should have about 1 1/2 to 2 cups of very smooth purée in the bowl. Discard any fibrous bits that remain in the sieve, and set the purée aside.

4. In a large bowl, whisk the eggs to break them up. Add the milk, cheese, salt and pepper, whisking to blend. Add the asparagus purée, and whisk to thoroughly combine.

5. Pour the artichoke mixture into the prepared 9” pan. Place the pan in the larger pan. Gently slide the pans into the oven, and, taking care not to splash, pour the boiling water into the larger pan until it comes about halfway up the cake pan. Bake until the flan is set and beginning to pull away from the sides and a toothpick inserted in the center comes out clean, 50 minutes to 1 hour. Transfer the cake pan to a rack to cool slightly, about 10-15 minutes.

6. Run a thin knife around the edge of the flan to loosen it. Invert a serving plate over the pan, and invert the pan onto the plate. Remove the pan, and discard the wax paper. Cut the flan into squares, and serve over tomato sauce.

Yield: 6-8 servings

Saffron Tomato Sauce
If you are using this to serve with the artichoke flan, you want the sauce the be very thick and not liquidy, otherwise it will seep into the soft texture of the flan.

1 tbl olive oil
2 small shallots, chopped
1 small garlic clove, minced
4 medium tomatoes, diced
1/4 cup stock or water
1 pinch saffron threads
1 tbl minced basil

1. Heat the stock until very warm, then add the safrron threads to dissolve.
2. In a saucepan, warm the olive oil over medium heat. Add the shallot and garlic and saute until soft and translucent. Add the tomatoes, stock with saffron, basil, and season with salt and pepper. Simmer the sauce 15-20 minutes, stirring occasionally, until most of the juices have eveaporated and the mixture is thick but not dry.

19 March 2007

Split Pea Sundays

split pea soup 2
Whatever happened to split pea soup? Maybe it’s that army green color, but it seems to have gone terribly out of style. When I first moved to New York I often stopped for lunch at the old counter luncheonettes tucked on the lower part of 2nd Avenue, with their bowls of kasha and warm challah breads. A rotating roster of soups kept both bellies and wallets full, and split pea was always a warming option for a chilly day. Maybe it’s just me, but I haven’t seen split pea around much lately, though I’m sure it’s still on the menu in those envelope-thin delis of lower Manhattan.

And speaking of things missing, whatever happened to spring? Just when there was hope of nature moving along its normal course, it goes and buries us in snow and ice. Staring pointedly at that printed label in my datebook that said “Spring Begins” several days ago, didn’t seem to help any. Nonetheless, hunkering down in the house gave me the opportunity to stew up some split pea soup and thereby rescue it from the fashion equivalent of army fatigues.
split pea soup 1
Split Pea Soup with Ham Variations

1 onion, chopped
2 carrots, diced
1 pound dried split peas
2 1/2 quarts water
1 smoked ham hock (see below for variations)
1 tsp sea salt
1 bay leaf

- Put the water, ham hock, bay leaf, and salt in a pot and simmer for 1 1/2 hours, skimming the surface, stirring occasionally, and replenishing water if necessary. Remove the ham bone and shred any ham meat and return it to the pot. Add the onion, carrots, and peas and simmer for another 45 mintues, replenishing water as necessary, until the peas are done to your liking and everything is soft and combined. Discard the bay leaf and serve.

Like any simple recipe, this is open to experimentation. Some sauteed bacon and chicken stock are welcome additions. You could also use chunks of sausage like Kielbasa in place of the ham (skip the initial simmering step). For a vegetarian version omit the ham and use vegetable stock along with 1 tsp of cloves.

15 March 2007

Guinness Stout Ginger Cake


I never really learned how to drink beer. In fact, shocking though it may be, I’ve very seldom had it. Please, allow me to explain: Growing up, we were a strictly wine-drinking household, with my mother barely branching out to a kir or a glass of Lillet on a special occaision. Later, my educational experience was more conservatory and classes than college and kegs. So I never really learned about beer, which certainly saved me some teenage embarassments, but may have also given me a (hopefully false) reputation as either a snob or a teetotaler.

When P. and I first were dating, I remember going to a bar and having no idea what to order. Of course, I wanted to look cool and sophisticated, but not too cool to be aloof, all of which I was worried would be conveyed in my drink order. Thankfully, I’m a little more comfortable ordering these days, and a lot less worried about impressing anyone. Over the years, P., as a Scotsman, has tried to introduce me to beer, carefully perusing shelves of fancy imports and unusual local brews. He sweetly asks if I’ll share a bubbly raspberry flavored one, and I’ll admit he’s had mild success, but I think it’s just that I’m not all that interested in drinking in the first place. What can I say, I’m a cheap date.

I once told P. that one of my favorite cakes was made using Guinness, which naturally he approved of, but then I told him how there was always about 1/2 cup of leftover beer in the can, and I usually ended up pouring it down the drain. “Now listen to me,” he said in a very serious tone, “promise me you’ll never tell that story to any of my family.” Luckily, these days I have him around take care of any leftovers. With St. Patrick’s Day coming up, I thought of this wonderfully moist and spicy gingerbread bundt, and what with the weather still wintery around here, it was just the right thing. This is one of my all time favorite cakes, and has won me many a friend and a recipe request over the years, as you'll see in the note below. We’re in New York and will be heading over to the parade Saturday, and who knows, maybe I’ll even have a Guinness myself.


Guinness Stout Ginger Cake
This recipe comes from the fabulous Claudia Fleming, whose myriad of recipes have never let me down, but even among those, this one’s a knockout. It certainly has a star on my own Cake Walk of Fame. It is a very moist cake, so don’t try dusting it with powdered sugar like I did, it will just absorb it. This is pretty good on it’s own, but if anything it calls out for a good scoop of ice cream as accompaniement.

1 cup Guinness Stout
1 cup molasses
1/2 tbl baking soda
3 large eggs
1/2 cup granulated sugar
1/2 c firmly packed dark brown sugar
3/4 cup grapeseed or vegetable oil
2 cups all-purpose flour
2 tbl ground ginger
1 1/2 tsp baking powder
3/4 tsp ground cinnamon
1/4 tsp ground cloves
1/4 tsp freshly grated nutmeg
1/8 tsp ground cardamom
1 tbl grated, peeled fresh gingerroot

1. Preheat the oven to 350F. Butter & flour a 10-cup Bundt pan, or 2 loaf pans.
2. In a large saucepan over high heat, combine the stout and molasses and bring to a boil. Turn off the heat and add the baking soda (you need a big pan because this will foam up a lot). Allow to sit until the foam dissipates.
3. Meanwhile, in a bowl, whisk together the eggs and both sugars. Whisk in the oil.
4. In a seperate bowl, whisk together the flour, ground ginger, baking powder, cinnamon, cloves, nutmeg & cardamom.
5. Combine the stout mixture with the egg mixture, then whisk this liquid into the flour mixture, half at a time. Add the fresh ginger and stir to combine.
6. Pour the batter into the pan and bake for 1 hour, or until the top springs back when gently pressed. Do not open the oven until the gingerbread is almost done or the center may fall slightly. Transfer to a wire rack to cool.

* You can make a chocolate variation, like this gorgeous one over at Smitten Kitchen, by adding 1/2 cup cocoa to the batter and increasing the oil by 2 tablespoons.

14 March 2007

Samak bi Tahini (Fish in Tahini Sauce with Roast Lemons)


I’ll admit that I can be a bit cantankerous when it comes to food choices. It’s not so much that I’m terribly picky, I can usually find something I like on any sort of menu. It’s just that sometimes I get it in my head that I want a certain thing, and nothing else will do. If the store is out of my favorite round loaf of bread, I’ll stand at the bread counter forever, trying to figure out what to get instead. I am easily baffled by the myriad of canned tomato options, reading every single label, and if they are out of the Asian pears I had been looking forward to, I might be seen moping dejectedly by the produce.

So the other night when I walked into the grocery with a mind to make samkeh harra, a famous Lebanese fish dish with spicy stuffing, things could have ended badly. It was late, I was hungry and I had already picked up two big bunches of herbs when I discovered the store was out of whole fish. I was puzzling over whether I could gently place the herbs back in the produce section (what's the etiquette on this, I mean, I hadn't actually used them, but I still feel weird putting them back). Anyway, while the fish situation could have flummoxed me or sent me home can-of-soup in hand, I cheerfully rolled with the punches, picked up a fillet, and decided to try my hand at another Lebanese dish, samak bi tahine, fish with tahini sauce. Surely, there would be other days for whole fish.

The tahini sauce in question does not remain distinct but melts creamily into the fish, leaving a flavorfully tender dish. I slipped some lemon slices underneath purely for aesthetic value, but to my surprise, they roasted into the perfect nutty soft accompaniements to the fish, and I’m already dreaming up some sort of roast lemon salad or relish. This is best served at room temperature or cold, which accentuates the tahini flavor and makes it the perfect do-ahead entree.


Fish in Tahini Sauce with Roast Lemons
I think this is best made with a medium thick white fish, but it is equally adaptable to thicker or thinner fillets, if you do so you’ll want to adjust to baking time and amount of sauce accordingly. This is best served at room temperature or cold.

2 lbs white fish fillets
salt, olive oil
3 lemons
1 cup tahini (sesame seed paste)
1 cup water
2 large onions, thinly sliced
cilantro for serving

1. Preheat the oven to 425 F. Rub the fish with salt. Juice 2 of the lemons and slice the 3rd lemon.
2. Combine the tahini with the lemon juice and stir until the mixture is thick and lightened in color. Stir in the water to form a thin sauce.
3. Lightly oil a baking dish and place the lemon slices in it. Place the fish over the lemon slices and rub with a little oil. Place the fish in the oven and roast for 20 minutes.
4. Meanwhile, saute the onions in some oil until softened. Add the onions to the tahini sauce.
5. After the twenty minutes, remove the fish from the oven, it should be thick and opaque. Pour the tahini sauce over the fish, scattering the onions on top (I like to reserve a little extra tahini to drizzle on before serving). Return the fish to the oven and bake another 30-35 minutes, or until the sauce has thickened and is bubbling all over. Let cool before serving, with cilantro as garnish.

*I have also made this substituting a mild nut butter, such as almond or cashew butter, with good results.

12 March 2007

Hibiscus Macarons


It seems French macarons, those wonderful confections decorating Parisian patisseries, have finally made it across the pond. Unlike their American double 'oo'-ed cousins, these almond cookies bear smooth tops and sandwich creamy fillings for a wonderful chewey texture. And as they pop up in more and more American bakeries, I just want to say that I was there first. Me, ahead of the trend.

Several years ago I had read somewhere about the famous macarons of LaDuree and made a point of seeking them out on a week long soujourn in Paris. Immediately, I was smitten with the colorful myriad of flavors and I will admit I made an almost daily pilgrimmage from my 5th arrondisement hotel for my macaron fix (I say almost daily because it had to broken up with some Damien's caramel beurre salle ice cream, of course). When I returned to the U.S., a country sadly macaron-less at the time, I set out on a quest to make my own.

However, I soon discovered that making macarons was not as easy as I thought. First, even finding a recipe was difficult, as I searched through cryptic pastry chef recipes in French with metric measurements. Luckily, a thorough discussion on EGullet and Pierre Herme's recipes helped. But there were also the cookies themselves, which are notoriously difficult to master. The goal is to get macarons with frilly little 'feet' around the edges and smooth tops. I whipped egg whites, piped and baked, piped and baked again, but my cookies came out flat or deflated. Finally, on my third or fourth try, there they were, a whole sheetfull of little feeted cookies. I baked up bunches of chocolate macarons that day, and then I never made them again. I had conquered the macaron, and I had no desire to return to battle.


Over the following years, a few well-timed trips to Paris kept my macaron craving sated, but recently I'd begun to get a little itchy. I knew it was bad when on a trip with a layover at Charles DeGaulle, I considered whether I could have macarons delivered to the airport (I already knew you couldn't get them in duty free). Luckily, my more frugal side kicked in, and I decided to try my hand at making them again.

Now, if this tale has not made me sound crazy enough already, this is the part where my Indian grocer and his flower powders come in. There is a small Indian grocery near my appartment in New York who stocks all kinds of wonderful spices and dried beans and flours and international products. I had stopped in there to pick up some zaa'tar, a staple in my house, and was as usual browsing the unusual products lurking on the shelves. Norwegian root powder? Red seaweed? And there in a little plastic bag, a pink powder labeled hibiscus flower powder. "Do you know what you use this in?" I asked the grocer; but the man speaks not a word of English. So, since I apparently do not posess the normal-person's fear of purchasing strangely colored powders in tiny subterranean stores, I bought it anyway.

A few days later as I embarked on my macarons (I also made this ginger-apple version), that little pink bag caught my eye, and I thought I could experiment with a batch of hibiscus macarons. I didn't expect the hibiscus to make a big difference, but to my surprise they turned out wonderfully, with the hibiscus bringing a pronounced tart-sweet floral note and a bright purple interior. I should have made a proper buttercream filling, but after all those cookies, I lazily folded some jam and hibiscus into some whipped cream I already had in the fridge, and the result was lovely. They lasted about 3 days chilled, but we had no problem devouring them all by then.

Please don't be put off by all my mis-adventures with macarons. Once you get a feel for them they are quite easy to make. It is important that the batter have just the right consistency, so if you have a kitchen scale, now's the time to use it. Also, as you'll see in the note below, hibiscus powder is not that hard to find, but you could also experiment with other flavorings, like these and these..


Hibiscus Macarons
Hibiscus powder adds a tangy floral note and can be made by grinding hibiscus tea or dried hibiscus flowers into a powder. You could also experiment with using dried roses or another floral or herbal tea blend.

1 cup (100 g) powdered sugar
1/2 cup (50 g) ground almonds
3 tbl hibiscus powder
2 egg whites, at room temperature
1/4 cup (55 g) sugar

1. Preheat the oven to 375 F. Line baking trays with parchment paper.
2. Pulse the ground almonds, powdered sugar, and hibiscus powder in a food processor a few times to combine (this will also help make sure you don't have any large chunks of almond). In a clean bowl, beat the egg whites with an electric mixer until they hold soft peaks, gradually add the sugar and beat until the whites hold stiff peaks.
3. With a spatula, fold the almond mixture into the egg whites. Fold using smooth strokes until the mixture is encorporated- the whites will deflate somewhat and the batter should be thick and flow like magma.
4. Transfer the batter to a piping bag and pipe into 2 inch rounds (about 2 tablespoon-fulls) on the baking sheets. Bake in the center of the oven for 15-18 minutes, the macarons should form frilly 'feet' and smooth tops. Let cool completely, then remove from the parchment. Sandwich the macarons with a tablespoon of filling.

Quick Hibiscus Filling:
1 cup whipped cream
1/4 cup Damson plum jam or tart seedless berry jam
2 tbl hibiscus powder

Combine all ingredients. If you use this filling you'll have to keep the macarons refrigerated to keep the cream from running.
You can also make a basic buttercream by creaming 6 tbl butter and 1 cup powdered sugar, then fold in the hibiscus for a more stable filling.

10 March 2007

Wallflower


Growing up in Baltimore, you get to know crab in pretty much all of its forms. From the most intimite act of picking meat at a crab feast, the superlative crab cake, the elegance of the soft-shelled crab, and any crab dip, salad or sandwich in between. Yet despite all those years spent minutes from the Chesapeake Bay, I had never met Maryland crab soup.

Obviously, Maryland crab soup must have been around, but it seems we were never introduced. She’s a bit of a wallflower, you see. She lurked, unnoticed, in the corners of menus and scrawled on local tavern chalkboards. I suppose I never ordered her because I assumed she was chock full of cream like a rich bisque, and I never paid attention when anyone else did. However, she and I are quickly becoming fast friends, if our recent lunch dates are any indication.

It turns out this soup has a nice tomato and vegetable base which carries gorgeous lump crab meat. But don’t let the plain-jane exterior fool you, for there’s a little trick up her sleeve, in the form of a tiny pinch of Old Bay seasoning. Just enough to give the soup a bit of interest, and to keep it firmly rooted in the region, along with the wonderful corn and lima beans that come from Maryland’s Eastern shore. And not that I want to call her easy, at least not in a pejorative sense, but she’s only a quick simmer away from your own table.


Maryland Crab Soup
I know, I know, crab meat costs a fortune, but you only live once. You can toss in whatever vegetables you like, such as potatoes, peas, cabbage, or green beans, and adjust the cooking time as necessary. Some people like a little dash of hot sauce too.

1 tbl butter
1-2 ribs of celery, sliced
1 cup carrots, peeled and diced
1 (28 oz) can of tomatoes, chopped if whole
2 cups fish stock or combination clam juice and water
1 cup baby lima beans, thawed if frozen
1 cup sweet white corn, thawed if frozen
1 tsp salt
1 tbl Old Bay (or to taste)
1 lb jumbo lump crab meat

1. Melt the butter in a large heavy saucepan. Add the celery and carrots and cook over medium heat until softened. Add the tomatoes, stock, lima beans, corn, salt, and Old Bay and bring to a boil. Lower the heat and simmer for 10-15 minutes, until the ingredients are softened and combined.
2. Stir in the crabmeat, cover and simmer another 10 minutes. Serve.

About 100 calories per cup.

08 March 2007

Diversity and Enfrijoladas


For a short while I taught English in Damascus, where my students consisted primarily of teenagers from upper class Syrian families. The job paid extremely well, but what I liked most about it was how much I learned from the students themselves. Just as they offered me a glimpse into their lives, it soon became clear that what I had to offer them was not just proper pronunciation and subjunctive clauses but a window into another culture.

Their questions were revealing: Do students have to stand up to address their teacher? Do teachers hit the students? What are extracurricular activities? Can a girl meet a guy in a cafe and won't someone see them and tell her parents? Why is 'nature' always singular? Do you take the subway alone in New York?

Among their peers, these kids purported to be experts on America: their English was good, they had seen all the movies, they used the internet, some had traveled abroad. They knew more about Hilary Duff than I did. Yet many of them lacked what mere films cannot convey, an understanding of the multi-dimensionality of such a large and diverse country. Condensed to Hollywood form, America became a land of wonderful freedoms, but also of salacious sexuality, debauchery, and rampant crime. New York and Los Angeles combined to geographic proximity, Dearborn grew in size exponentially.

Whenever I asked my students what they thought the largest immigrant group in the United States was, they always answered Arab. Even on a second questioning, they were positive of their answer. I was always surprised by their lack of knowledge as I explained to them about the current issues of Hispanic immigrants, the past history of Irish and Italians. We talked about 'the melting pot,' but they were still confused by multiculturalism. In a society so grounded in tradition, where people still cite old family names and villages and marriages often rely on family background and dowries, the idea of a Mexican-Filipino love-child was understandably hard to grasp.

Living in a country where the majority of the population is the same ethnicity, being a foreigner becomes something to be remarked on, even pointed out in the street. I truly came to appreciate the multi-culturalism of the United States, how easily we slide between cultures and traditions, eating Chinese one night and French the next; our culinary comforts are just as mixed up as our heritage. Those Mexican, Dominican, Puerto Rican immigrants have added to our culinary landscape, not only introducing us to empanadas and tamales but also as laborers growing so much of the produce we consume.

At the same time, I am often reminded how little I really know about traditional Mexican foods, as when I came across a recipe for enfrijoladas the other day. It turned out to be a wonderful little combination of corn tortillas in a black bean sauce. The bean puree is so simple and good, I scooped every little delicious bit that had crusted to the pan, and was also reminded how good a fresh corn tortilla is. I'm an American with an Argentine name who speaks Arabic and makes French macarons one day and Thai curry the next. And the other day I was eating a Oaxacan brunch dish for dinner. Hooray for diversity.


Enfrijoladas (Tortillas in Black Bean Sauce)
This is a good dish for brunch, alongside a plate of eggs, or as a light supper, when you could pile some shredded chicken or chopped tomatoes on top as well. Try to find the freshest corn tortillas available, check a local Hispanic market or you can even make them yourself. Serves 4.

3 cups cooked black beans
2 cloves garlic
1 tbl lard, or butter
1 tsp cumin
12 corn tortillas (6 inch diameter)
1 cup queso fresco or feta cheese
1 cup minced cilantro
optional: 1 tsp minced serrano chiles, mexican crema

1. If you are cooking the black beans from scratch, you can combine the dried beans with water, garlic, cumin, and lard and simmer for 1 1/2 hours. If you are using canned beans, put the beans with the garlic, lard, cumin, chiles (if using) and ~1 1/2 cups water and simmer about 15 minutes, until the beans are soupy and the garlic soft.
2. Using a blender, puree the beans until very smooth and thick. Return to the saucepan, stir in a bit of salt, and keep warm over low heat.
3. Rub a skillet wih a tiny bit of corn oil. Add the tortillas, one at a time, and heat a few minutes on each side. You just want to warm the tortilas, you don't want them to toast or become stiff. Using tongs, immediately transfer the tortilla to the black bean sauce and turn on both sides to coat. Fold the tortillas into thirds or quarters and place in a serving dish or plate. Continue heating, dipping, and folding the tortillas and placing them on plates, arranging 3 tortillas per plate.
4. Pour the remaining bean sauce over the tortillas on the plates. Sprinkle each with cheese and cilatro, and crema if desired. Serve immediately.

*I want to add that this is a very healthy dish, especially considering how satisfying it is. Corn tortillas are generally low calorie (~30 calories each), the beans have protein and fiber, and feta is a naturally low-fat cheese. About 215 calories per serving.

05 March 2007

Stand By Me


We all have them, those stand by recipes that we make without thinking, our hands instinctively reaching for the salt at just the right moment, trimming vegetables while our mind wanders to other things, soothed by the methodical chopping motion of the wrist. Over the years, a good side dish recipe becomes part of your arsenal, easy enough for an average dinner but also good enough to be rolled out at a holiday or fancy party, alongside other dishes.

These two recipes are part of my arsenal, and while neither are dead-simple, they are definitely tasty enough to warrant the little extra time. Carrots and cumin are natural partners, and this recipe alone is the reason I keep whole cumin seeds stocked in my pantry. Once you've made it a couple times, you'll get find it easy to reproduce from memory without the need for a recipe.

I once had braised leeks at a friend of my mother's house and immediately became enamored, ok, I'll admit, obsessed, with them. It took me quite a few tries to get my leeks to be as silky and soft as those first ones I had, but in the end the final recipe also turned out to be the easiest one. I love these leeks so much that I often eat a huge pile of them, with some bread and cheese, as my lunch or dinner.

Carrots with Cumin and Orange
The combination of carrots, cumin, and orange is classic in Algerian and Moroccan cuisine. This recipe is a French interpretation of those flavors, adapted from Patricia Wells' "The Paris Cookbook."

2 lbs carrots, peeed and sliced into rounds
2 tbl cumin seeds
1 large garlic clove, sliced
1 tsp sugar or honey
1/3 cup fresh orange juice
1-2 tbl butter

1. Toast the cumin seeds: Heat a small nonstick skillet over medium heat for 2 minutes. Add the cumin and toast, stirring and shaking the pan constantly to prevent burning. Watch carefully, for the seeds will brown quickly. (Lower the heat if the cumin appears to be browning too quickly.) Toast just until the cumin fills the kitchen with its fragrance and turns dark brown, about 4 minutes total. Immediately
transfer the cumin seeds to a plate to cool.
2. In a large skillet, heat some oil over moderately high heat until hot but not smoking. Add the carrots, garlic, sugar and toasted cumin seeds, stirring to coat. Add enough water to cover the carrots by half and salt to taste.
3. Partially cover the carrots, either with a lid set askew or a piece of greased parchment with some holes poked in it. Bring to a boil over high heat. Reduce to a simmer and cook for 25 minutes. Add the orange juice and cook over low heat, uncovered, stirring from time to time, until almost all of the liquid has evaporated, about 10 minutes. At serving time, stir in the butter. Taste for seasoning and serve.

Braised Leeks
Adapted from Julia Child and Margaret

6 large leeks, green parts and root ends trimmed
4 tbl butter
4 cups stock or water
salt

1. Preheat the oven to 400 F. Halve the leeks and carefully wash any grit from inside the leaves. Arrange the leeks tightly in an oven-proof braising or roasting dish.
2. Fill a saucepan with the stock or water and add the butter and salt to taste (I find if I am using good stock I need only a tablespoon of butter, but if I'm using plain water I want more butter, your choice). Bring the liquid to a simmer, stirring so the butter melts, then pour over the leeks in the pan so that the leeks are half-way submerged. Add more water if necessary. Cover the dish very tightly with foil and transfer to the oven. Braise for one hour.
3. Remove the foil from the dish and return to the oven. Braise for another 30-45 minutes, stirring occaisionally, until the leeks are golden and the liquid is reduced to a glaze.

*You can also do the first half of the braise on the stove top, stradling the covered pan over two burners on very low heat, then uncover and transfer to the oven for the final braise.

03 March 2007

Orange Almond Cake

orange-almond cake1
When a recipe is praised and published in almost identical form by three well respected cookbook authors, you'd think that would be enough to convince you to make it? And when one of those cooks serves it at her own holiday table, well that should be good extra ammunition, right? But I'm afraid, consumate baker that I am, that this recipe lingered in the clippings pile for several years before I finally put it to use. Years, people. And what finally convinced me to make it? A bag of leftover ground almonds I had from making macarons. More frugality than inspiration I realize, but the good part is that this cake got made, and the accolades from all those experts resoundly verified.

The cake involves cooking whole oranges until they are completely soft and then pureeing them whole. The orange mixture is combined with almond meal, eggs, and sugar, and then baked, that's all there is to it. The orange adds a wonderful moistness to the cake and keeps the sweetness in check. I took this to a dinner party and was worried it might need a little whipped cream to liven it up, but the cake is actually quite moist and flavorful and held the show on its own. Because it's not to sweet, it ended up being the perfect compliment to a Chinese meal (may I add fabulously executed by a friend of my mother's). Certainly a keeper, though I suppose I should have known that.
orange almond cake 2
Orange and Almond Cake
Because this is flourless, it's great for people with gluten allergies. From Claudia Roden, Nigella Lawson, Trish Deseine, and the Traveler's Lunchbox.

2 large oranges (or 4 clementines)
2 1/3 cups almond meal (ground almonds)
6 eggs
1 cup sugar plus 2 tablespoons
1 tsp baking powder

1. Place the oranges in a pot of water, bring to a boil, and then simmer for 2 hours, until they are completely tender. Remove the oranges and let cool (can be done 1 day ahead).
2. Preheat the oven to 375, grease an 8 inch round pan. Halve the oranges and remove any pips. Place the oranges in a food preocessor and process to a chunky pulp. Add the remaining ingredients and process to combine. Pour the batter into the prepared pan and bake for 50 minutes to one hour, until golden brown and set.